Showing posts with label operation. Show all posts

Monday, February 20, 2017

Hire the Employees and Earning Statement Process in Dynamics365


Hire the Employees and Earning Statement Process in Dynamics365


In earlier discussion, I explained how to create position in Dynaics365, now we discuss how to create the Employee and process the salary in Dynamics365.


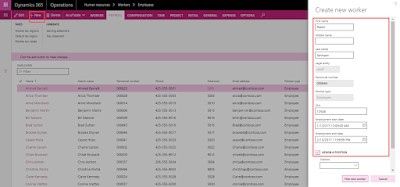
To Create a employee, Go to Human resource and select the Employees.


Click on the new Employees and add the name of employee. Automated personal number allocate to employee on the basis of number sequence, enter the SSN number and Employment Start date.


We can assign the position later or same time. After tick on the ASSIGN POSITION, all blank position is available for allocation. We assign same position we created in previous blog.


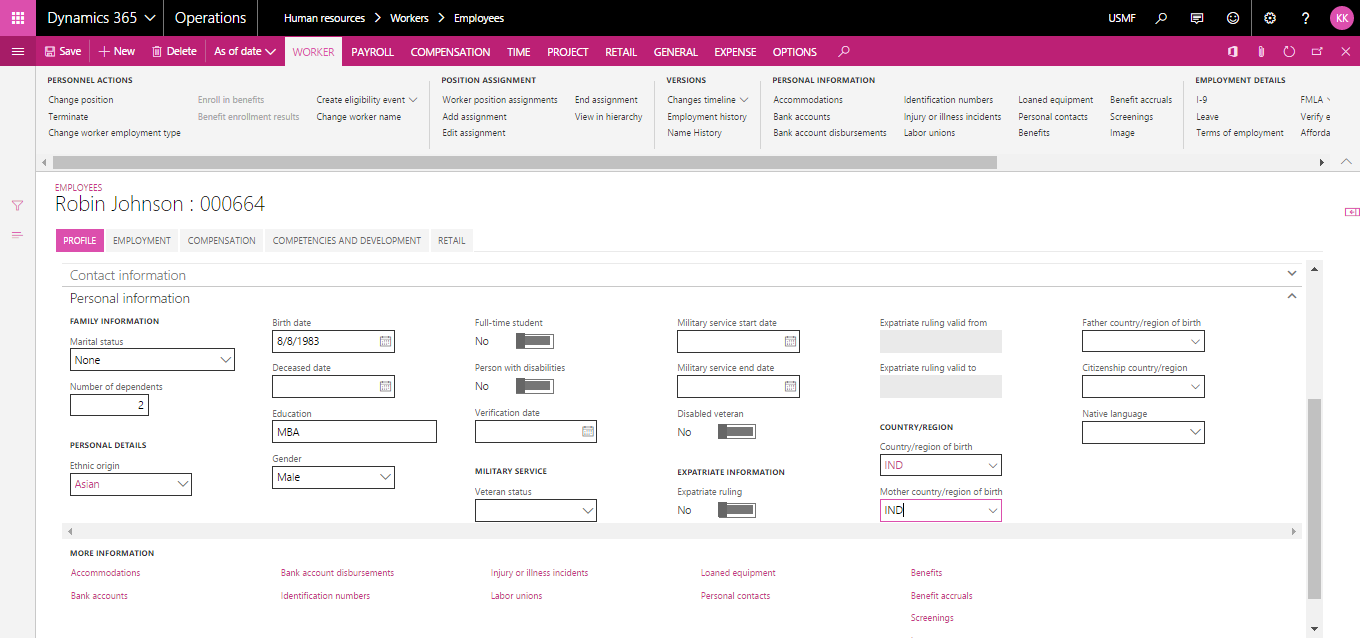
In profile section we assign the basic details of the employee.


In personal section we assign the personal information of employee


We have different section for entering the different information. Other important part for salary is his/her Bank account number and disbursement detail. For that we click on bank account under the more information and enter the bank details.


After enter the bank detail, click on the bank account disbursement form and click on new.


For the detail of Benefit and benefit accrual. Click to add on benefit and benefit accrual form.

Click “New”
For enter the benefit accrual click on “Benefit Accrual” and enter the details.


For assign the compensation, click on the Compensation and enter the fixed compensation.


Enter the Fixed Compensation for annual, click on new and enter the annual fixed compensation for annual.

Monthly and hourly equivalent will be calculated accordingly.


Other important things for Salary Generation in Worker Tax region and Default Tax regions. For enter the tax regions detail go to payroll tab and click on worker tax regions.
Close the form and select the Default tax regions.
Now Click on the Earning Statement and Generate the Earning Statement.
After the completion of the process info log appears.

Friday, February 17, 2017

Create Position in Dynamics365 (AX7)


Create Position in Dynamics365 (AX7)

Today we are going to discuss the step of position creation. For creation for position

Go to Human Resource module Click on position.


Click on the position then create new Position and assign the job and activation date for Position. Please note that Position Id will be generated on the basis of the number sequence


For Ex:- I have assigned Position of Account Manager job and activate from 01st Jan 2017 and click on the create position.


We can enter the Position detail. We will update the Department, Position Type, Compensation region, available for assignment.


For update hierarchy, we assign the report to position.


The most important part of position is payroll section. Please enter all the details.


 For the accounting prospective we enter the default Financial Dimensions for payroll.


This is the step for creation position in Dynamics365. Let me know if you have any doubt


Thanks


Wednesday, January 25, 2017

Vendor Invoice Process in Dynamics365


Vendor Invoice Process in Dynamic 365

In Dynamics 365 have simple process of create the vendor invoice.

Go to home pages and select the Vendor.


Click on the Purchase invoice.


In Dynamic 365, Base on your selection vendor is select for the invoice. for the Vendor Invoice Item Number , Quantity and Vendor invoice number is mandatory.

In Dynamics 365,Base on the vendor master setup tax code pick up automatic. you can change it your requirement and sale tax amount calculated base on the selection.

In Dynamic 365, You can Enter the discount in percent or amount.


For the check the posting we click on actions tab and click on preview posting.


It shows all the related transactions of different type.


For the GL entry click on 7.


Click on close and you can attach the document for the reference. for post the invoice click on post button

.


After the post you can take printout document or save it.


The preview of pdf document as follow.


Thanks


Kamal Kumar

Ph- 91-9996480619

Tuesday, January 24, 2017

View Posted Sale Invoice in Dynamics 365


View posted Sale Invoice in dynamics 365


Go to Dynamics 365 Home Page. Click on the Home and select the Sales.


There is different option for invoice and credit note for create new invoice click on the invoice tab. For the view the posted sale invoice click on the posted sale invoice


.


Every Columns have option to filter, you can sort and pass criteria according your requirement,


Click on view and Check the Sale order. you can reprint also.


.


Thanks


Kamal Kumar

Ph-9996480619

Tuesday, March 15, 2016

Tuesday, December 9, 2014

Vendor Customer Relationship in AX 2012


Vendor Customer Relationship in AX 2012


Create a Vendor /customer in Axapta 2012 and the relationship of vendor and customer.
Today we will have a discussion on how to create vendors and customers in AX2012. In some organizations, we purchase some material from our vendors and the same vendor is treated as a customer. AX provides a relationship between the Vendor and the Customer. For the creation of vendor/customer, follow this step. We create a Heaven Enterprise party and create customer vendor relationship.
Home->Common->Global address book
On the left hand, side there is there an option for party, customer, and vendor. If you want to create a vendor, click on vendor or if you want to create Customer click on customer.
k1
We are clicking the Party and entering the details of Heaven Enterprise their address and other misc. details.
k2
Click on the customer in the active pane. After that this party will be treated as our customer and the system will allocate a customer no.
k3
In above system allocation the customer no is –US_SI_0138. You can enter misc details of customer like the terms of payment, method of payment, credit and collection and close it.
k4
After that click on vendor and you follow the same process, enter the misc. details, and close it.
On the right side, there is role detail box, which shows the party details with the vendor and customer no.
We follow this process in AX to create a vendor and customer. When you enter the voucher it also shows the customer/vendor relationship balance like the picture below.
In the customer balance:
k5
In the vendor balance:
k6

Thanking you

How to create a Workflow in Axapta 2012


How to create a Workflow in Axapta 2012


In Axapta 2012, different modules have their own workflows. We can set up a workflow as per our requirements and with a given particular condition assignment. We will give a workflow condition on different entry forms.
For example, we can create a simple workflow in the general ledger entry form with the condition that if the journal amount is greater than 50000 INR, they require the approval otherwise no approval is required.
To create this workflow follow this step.
General ledger—>Setup—>General ledger workflows
k1
Click on New button and select the ledger daily journal workflow and click create workflow.
k2
Select the conditional decision, drag it between start and end. Again select the approved daily journal and drag it the left of the conditional decision.
k3
Select the end of the start and drag it to the conditional decision. When the conditional decision is true, we move to the left side. The journal goes to approve the daily journal and then drag it to the end. When the conditional decision is false, we move to the end. Therefore, we drag the left side to the end.
k4
After that, double click on conditional decision and the given condition there. In the given case we are given a condition that if the journal total debit amount is greater than 50000 it requires the approval.
k5
After given the condition close it. Then select the approve journal line and open it.
k6
Click on assignment and mention the approval user name on there.
k7
Then save and close it. At the time of closing they require a version no. It requires a small change, a new version number that has to be activated.
Once it is activated, it is given a unique workflow ID that we assign to our Journal name.
Go to General ledger->setup->Journal Name open journal name and assign the workflow ID there.
k8
Create a new journal Line and when you select- submit the journal name-, a yellow line will appear in the journal name.
k9
Create a new voucher on that journal no. You see that the post button is disabled and approval is disabled because as per our condition, voucher goes to Chandan for approval.

k10
After doing voucher entry close it and click on submit button and given comment.
k11
You also see the action and history of this voucher. After submission it is converted into action button. Click on that and view history.
k12
This process is the most helpful for creation of any workflow in Axapta2012.
From
Kamal Kumar
Email -kamalkumarax@gmail.com
Ph.8976898100

Project Expense Management in Microsoft Dynamics AX

The Reference Companion Guide is a Students guide and take away for this course. Please download, email or upload this guide for future use ...